

Sunday, February 24, 2013
SHAMELESS SELFPROMOTION
These are just a few of my designs available at my Society6 store @ http://society6.com/rhinestoneddreams
Saturday, February 23, 2013
DIY: Painters Tape Shirt
After SO LONG…. I'm finally back! Did you miss me? I'm not even are how it's already been so long since my last post… So I'm returning with a very simple and easy DIY…. The painters tape shirt…
Materials-
-Shirt… or any garment you wish to revamp
-Fabric Spray Point, or Fabric Dye in a spray bottle
-Painters Tape

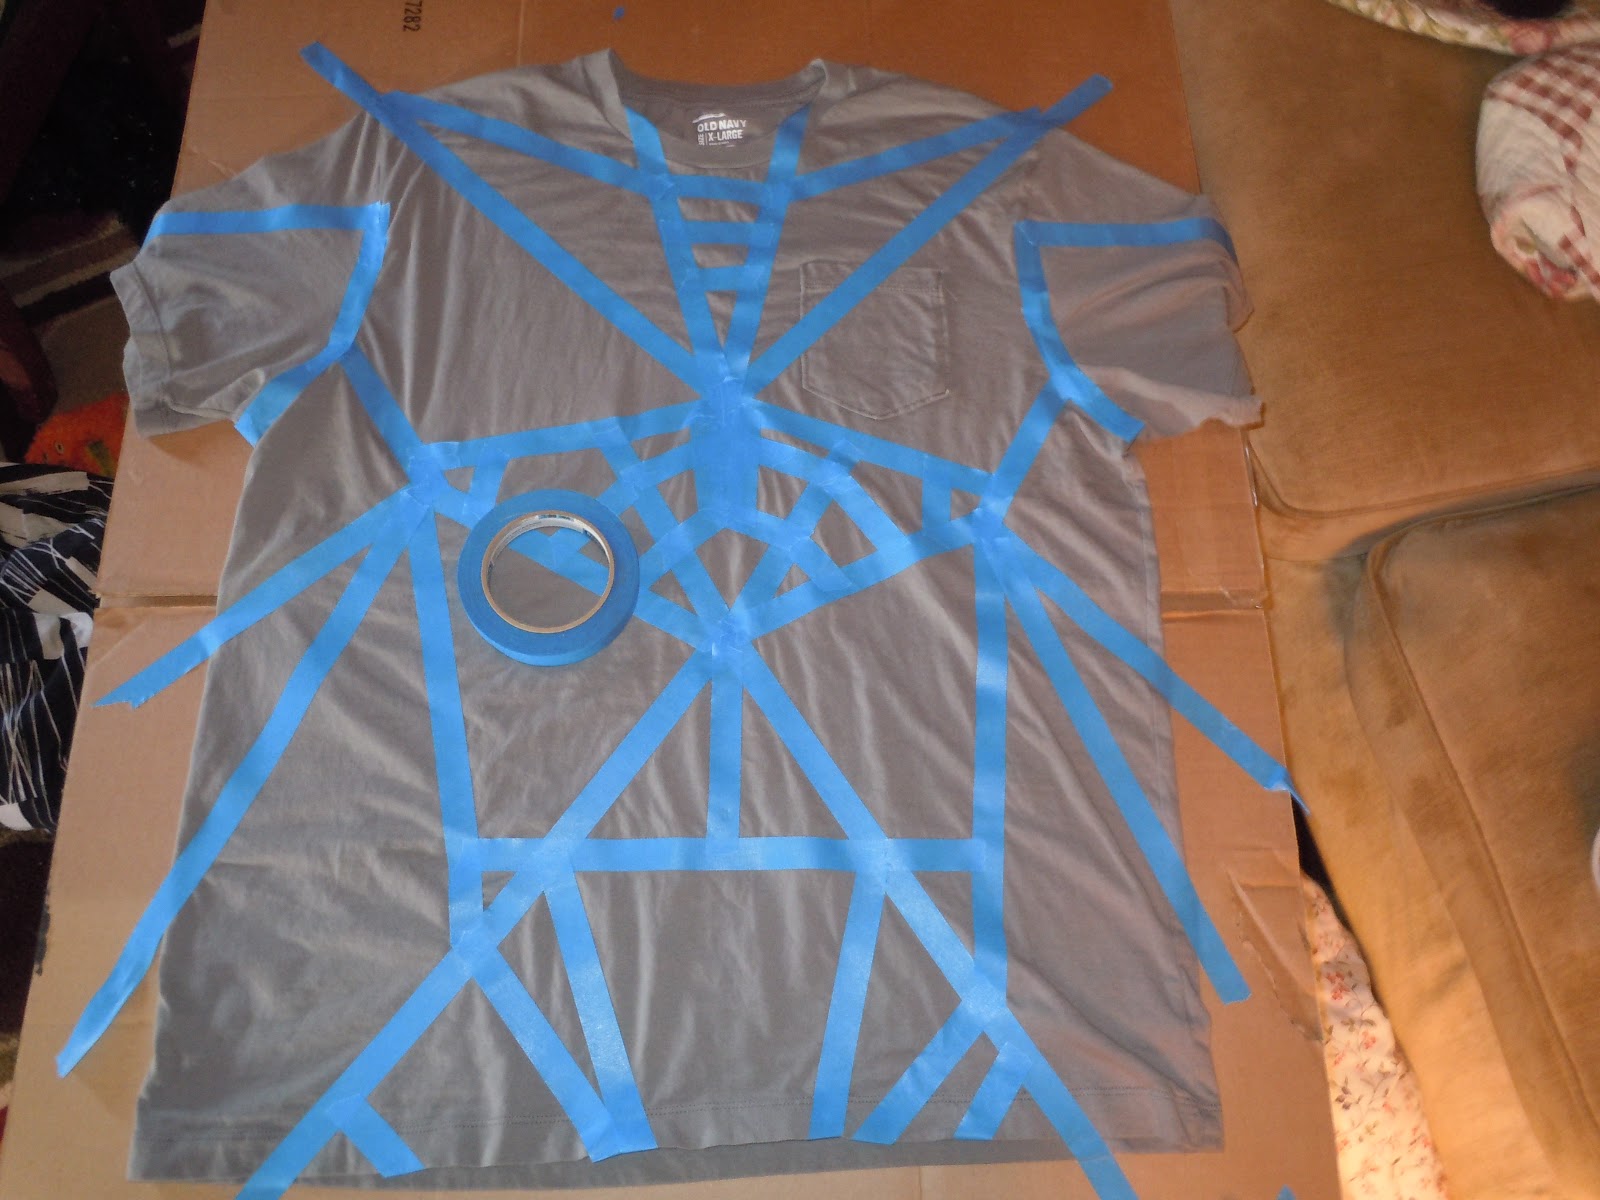
This is literally one of the easiest projects ever… LITERALLY! …..and the results are amazing. Simply lay out your garment on a piece of cardboard (you'll use the cardboard to spray on top of later) and begin taping away. I went with a (mostly) symmetrical design that kind of came out with a bondage-y feel. Tape both sides if you want a full design, connect the lines that end on the side and shoulder seams to make the design feel really complete. WARNING: Either use a good tape or really make sure it's all pressed down or you will have bleeding. I happened to like the effect.

Next… its exactly what you would expect….. spay time! Follow your fabric spray paint's (or dye in a spray bottle) directions for spraying your garment, and drying time. I used a mixture of two different fabric spray paints because one ran out mid spray. Of the two I have used I prefer Tulip brand's fabric spray paint over "Simply Spray". Though the "Simply Spray" has better packaging and nozzle it contains much less product that Tulip's spray.


In conclusion I LOVE the way my shirt turned out, and it has truly lasted. It has gone through TONS of washes and wears and has not faded a bit. This shirt has literally become one of my most grabbed pieces in my wardrobe.

Honestly I could have taken a better picture of the finished product… so look forward to a post featuring some better shots of finessed products of this and previous DIY projects… Maybe even an OOTD…?
Now back to my Rhinestoned Dreams,
Zane Walker
(I also wanted to acknowledge that I have in no way been paid by the mentioned companies, the views and opinions are my own)
Subscribe to:
Comments (Atom)